How to install the G.E.A.R
Using the Gambit Emergency Axle Replacement (G.E.A.R)
The G.E.A.R is to be temporarily used in place of a broken or faulty axle. It should be removed once a replacement axle is obtained.
Installing the G.E.A.R
Step 1: Remove complete axle assembly by removing the tire and un-bolting all required components.
Step 2: Determine what O-ring if any to use on your UTV. No O-ring is required for RZR Turbo S models and models that use the same wheel hub. The orange O-ring is for use on all Can Am X3 models. The black O-ring is for use on RZR Pro XP, RZR Pro R and RZR Turbo R models.
Step 3: Place the selected O-ring onto the O-ring groove of the centering collar of the bearing plug, insure it is seated into the groove.
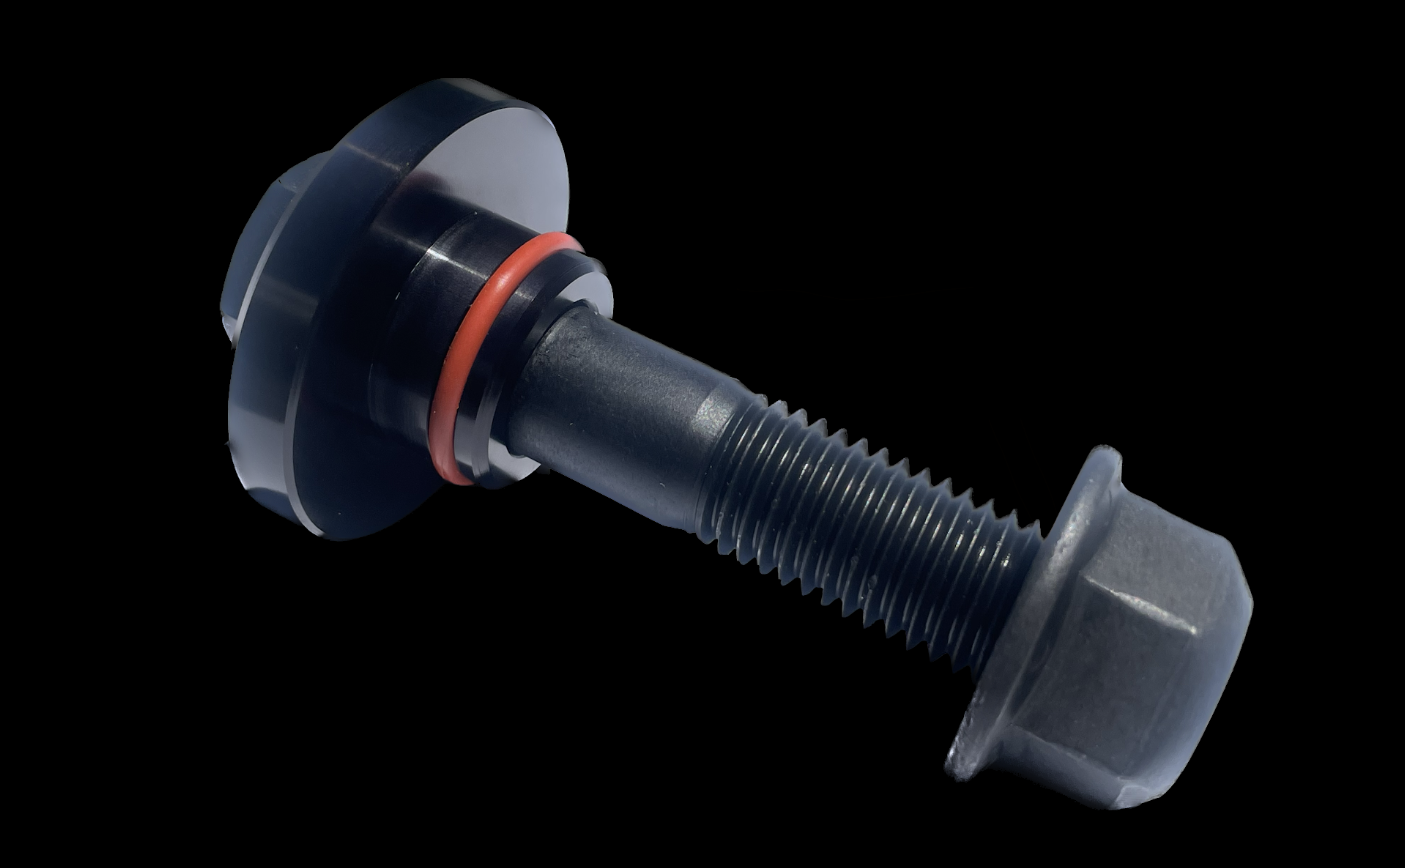
Step 4: Insert the provided bolt through the bearing plug with the collared side of the bearing plug facing towards the threaded portion of the bolt.
Step 5: Insert the assembled bolt and bearing plug into the back side of the wheel hub. The bearing plug should fit snug in the wheel hub while pressing against the inner race of the wheel bearing. The threaded end of the bolt should be protruding through the other side of the hub assembly as an axle would normally.
Step 6: Reassemble un-bolted components and securely fasten.
Step 7: With or without the factory axle washer (use if available), secure the entire assembly with the provided flanged lock nut. Tighten as you would an axle nut. (Both the bolt and nut require a 29mm or 1 and ⅛ inch sockets or wrenches to install) These tools should be added to your UTV tool bag.
Step 8: Reinstall tire and securely fasten.
*(For Can-Am models that utilize a Visco-Lok front differential, we recommend placing a piece of tape over the opening where the inner shaft of the CV axle would normally insert. This is due to Visco-Lok differentials not being a sealed unit. The tape prevents gear oil seepage from the Visco-Lok and also prevents outside contaminants from entering the unit.)
Operating your UTV after the installation of the G.E.A.R.
It is acceptable to operate your UTV at Normal NON-excessive speeds while the G.E.A.R is installed. Your UTV will operate and drive as normal without power being transmitted to the tire in which the G.E.A.R is installed.
If a G.E.A.R is installed in place of one or both rear axles, driving in four wheel drive is required. If a Gear is installed in place of one or both front axles, it is recommended to drive in two wheel drive.
Some vehicle characteristics may change. Most notably, if the G.E.A.R is installed on a rear axle the UTV will pull either left or right under hard acceleration. Hard accelerations ARE NOT RECOMMENDED while the GEAR is installed.

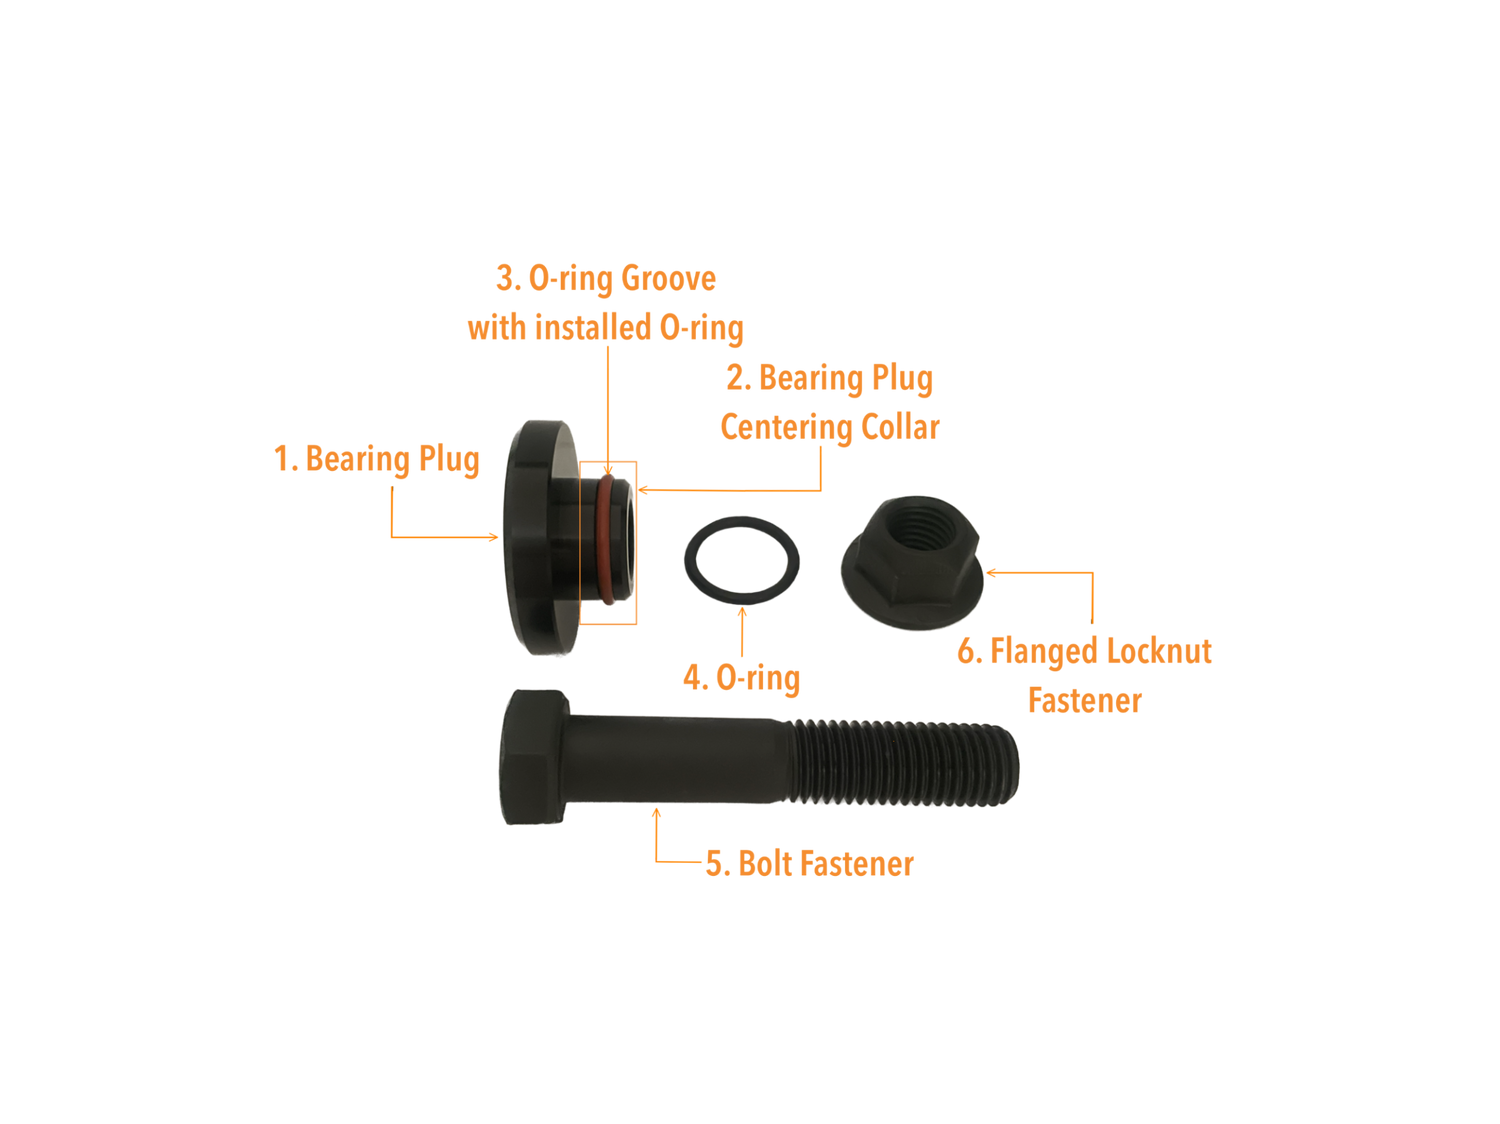
GEAR Components
1: Bearing plug
2: Bearing plug centering collar
3: O-ring groove with O-ring installed
4: O-rings
5: Bolt Fastener
6: Flanged Locknut Fastener

